Make Your Own Large Wheels
How to Easily Make 3" or Larger Perfect Wood Toy Wheels
The method described below works perfectly for wheels that are at least 3" in diameter. For saftey reasons, wheels smaller than 3" in diameter are dangerous to sand using a sanding disk. For smaller wheels we recommend the article How to Easily Make Small (Under 3") Perfect Wood Toy Wheels.
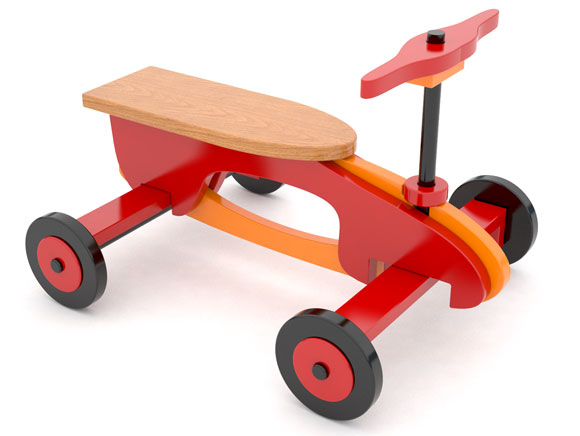
Above: Using the Quick and Easy Red Rocket Ryder as an example we'll detail the steps to make the 5" wheels and 3" hubcaps. These instructions and the detailed wheel patterns are included in the plan set but we'll explain how-to make the wheels without having a cut pattern.
Step 1: Rough Cutting the Wheels
If you have a wheel pattern apply the wheel pattern to the wood. Rough saw cut the wheel about 1/8" to 1/4" outside the pattern line. The pattern is marked for the wheel center axle.
If you don't have a wheel pattern with the center axle point, cut a block of wood that's 1/8" to 1/4" larger than the wheel diameter. For example if you want to make 5" wheels cut a block of wood that's 5-1/8" to 5-1/4" square. Draw a diagonal line corner to corner on the block to find the axle center point.
Step 2: Building the Wheel Jig
The wheel jig is one piece 3/4” x 6” x 12” and one piece 3/4” x 2” x 12”. MDF (Medium Density Fiber Board) is an ideal material for making jigs and fixtures but any 3/4” wood will do. For the Red Rocket Ryder the dowel is 3/4” dia. by 2” long (the diameter of the dowel would equal the diameter of your wheel axle hole). The two drilled holes are 3/4” dia. thru. One is for the hubcap and one is for the wheel.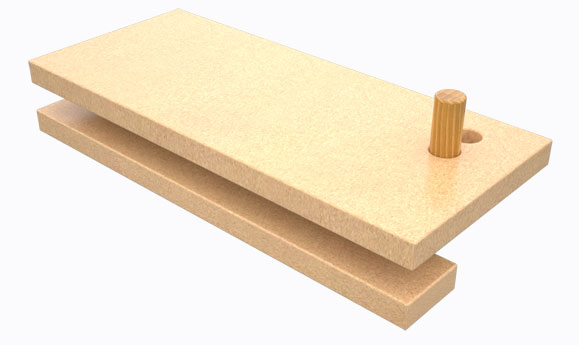
Step 3: Preparing to Clamp the Wheel Jig to the Disk Sander
A. The wheel jig is clamped to the table of the disc sander (Step 4 shows the wheel jig clamped onto the disc sander). The narrow piece on the bottom creates a flat and stable surface for the bottom feet of the bar clamps.
B. When sand-turning smaller 1/8” thick hubcaps it is helpful to add a small block. The block has a 3/4” dia. hole that slips over the dowel. It provides finger room for turning the part.
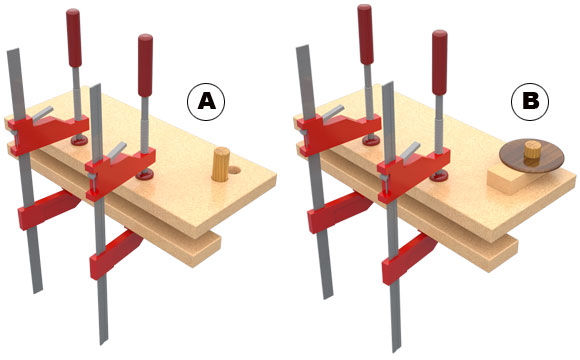
Step 4: Clamping the Wheel Jig to the Disk Sander
The photo below shows the wheel jig in place on the disk sander. For the 5” Red Rocket Ryder wheel the center of the dowel is 2-1/2” from the face of the disc. For the 3” Red Rocket hubcap the center of the dowel is 1-1/2” from the disk. The dowel is not glued in position. 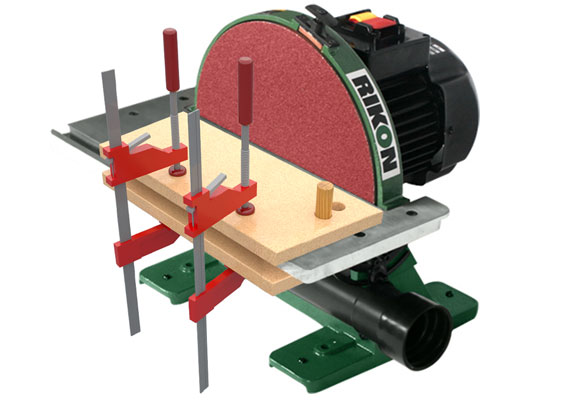
Step 5: Sanding the Wheel to a Perfect Diameter
If you haven't already, saw out the wheel and hubcap parts. Precise sawing is not required. Make the saw cuts 1/8” to 1/4”outside the pattern line. The disc sander is used to true up the diameter of the wheel by turning the wheel counter-clockwise into the disk while the disk is rotating. See photo below.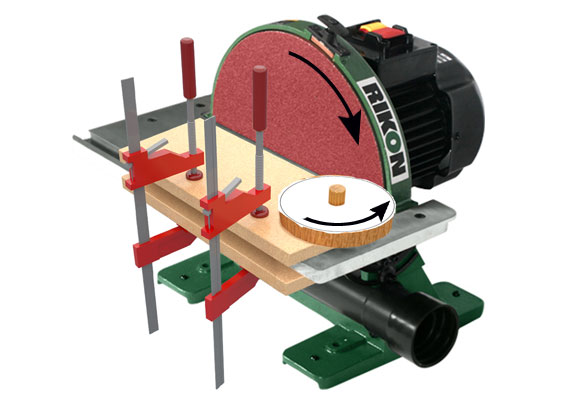
Step 6: Adding a Finishing Touch to the Wheel Edges
The edges of the wheels can be beveled by holding the wheels at a 45 degree angle while gently rolling the wheel into the sanding disk on the 
Read More: To make wheels smaller than 3" in diameter see the article How to Easily Make Small (under 3") Perfect Wood Toy Wheels. To make perfect wood toy axle holes for your wheels see the article Learn to Make Perfect Wood Toy Axle Holes.
