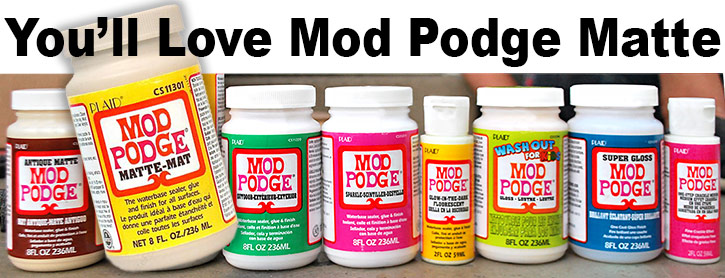
Mod Podge Basics
How to Attach Image Art with Mod Podge or White Glue

Mod Podge is a legendary decoupage medium which means it's an all-in-one glue, sealer and finish used to attach paper and fabric to wood and various other surfaces. It is available at almost any crafts store and on numerous websites. Mod Podge is our No Painting Required secret to quickly crafting high-quality wood toys using our original image art included in every plan set.
Can Elmer’s glue be substituted for Mod Podge Mat?
Yes, and with successful results. Mod Podge and any carpenter's white glue can be used for decoupage as a glue, a sealer and also a durable non-toxic product that is safe for toys. Both products create a long lasting and strong bond with the wood. When using Elmer's or any carpenter's white glue for decoupage, thoroughly mix two parts white glue with one part water before applying the glue.
Is Mod Podge Mat waterproof and safe for children’s toys?
Uncoated Mod Podge Outdoors is a very water-resistant lab-tested product but it is not completely waterproof. Fabric Mod Podge can also be used to glue paper to wood and is completely machine washable and quick drying. Mod Podge is a combination of non-toxic waterbase medium and acrylic and is safe for use on children’s toys. Mod Podge products are not food-safe formulas and should be avoided when making toys for teething children. If you want to make your project completely waterproof add a finish coat of polyurethane clear or acrylic clear finish over a completely dry Mod Podge surface. Mod Podge and Mod Podge Outdoors can be safely cleaned with a damp cloth.
How do I create toys with such beautiful artwork and colors?
All you need is common Mod Podge and color inkjet or laser computer printouts.
How do I work with Inkjet versus Laserjet prints?
First, remember this, Laserjet prints do not bleed. Inkjet prints can bleed under certain conditions but that is easily solved and explained a little later in this article.
What paper should I use?
Use common uncoated printer paper. Coated paper can cause issues with the Mod Podge. Test coated papers before applying them to a finished toy. We have success with standard 20 lb. uncoated paper but prefer 24 lb. bright white laser paper. It is a sweet solution and costs only pennies more.
How to make successful Inkjet color prints:
Print the image onto the paper and let it dry for ten minutes or more. Seal the ink by spraying both sides of the paper with 3 or 4 light coats of clear sealer. There are several brands of sealer available. We've had great results with Krylon Crystal Clear. Let dry before proceeding. Then, brush on a thin coat of Mod Podge onto both sides of the printed/sealed paper. Let dry. The printed paper is now ready to adhere to the wood using Mod Podge.
How to make successful Laserjet color prints:
Laserjet prints require no preparation. Laserjet prints can be Mod Podged to the wood toys as soon as the prints are out of the printer.
How do I permanently apply the color prints to the wood toy parts?
First apply an even coat of Mod Podge to the back of the color print and also to the surface of the wood toy part. The coverage should allow you to visibly see an even spread of white Mod Podge that completely covers the surface. If the Mod Podge is clear in any area, that area has dried. The wood surface and the color print back surface must be wet when you apply the color print. Apply enough Mod Podge to the surfaces so that each is an even white color of wet Mod Podge. If there are clear spots on the surface it means the Mod Podge has already dried and the surface needs more. Clear areas will wrinkle when the print is dry. Next, apply one to three thin seal coats of Mod Podge to the surface of the color print. When the seal coat is dry apply one to three finish coats of waterproof polyurethane clear gloss.
John and Cynthia Lewman
ToymakingPlans.com
Parkville, MO 64152
support@toymakingplans.com

